The playground helps with testing OIDC calls step-by-step, thereby giving insight into how OpenID Connect works.
This article will cover the following topics
- Set up an Okta App in your Okta developer account. This will represent your OIDC provider.
- Screenshots showing how to test an OIDC provider using the OpenID Connect Playground at https://openidconnect.net


Okta setup
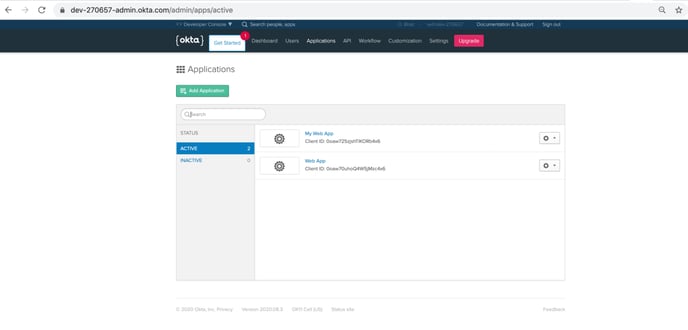
After logging into your Okta developer account, click on the Applications section. And then click on the “Add Application” button seen in the image below.
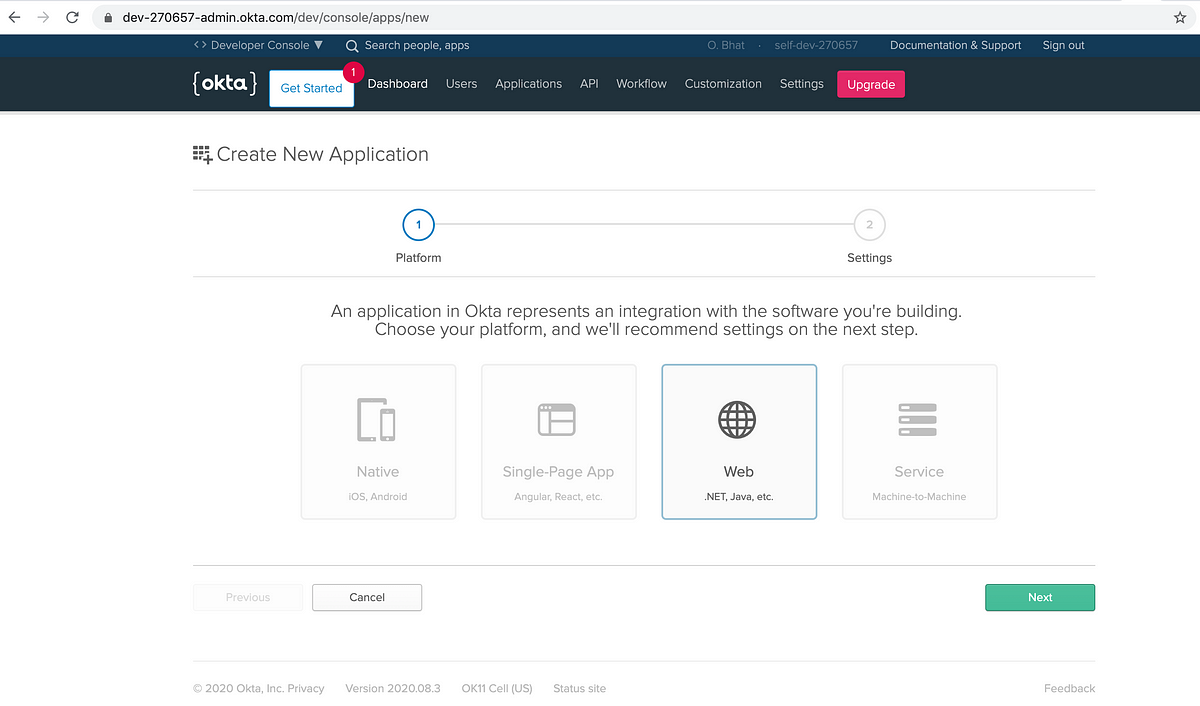
On the next page, select “Web” and then click “Next”.
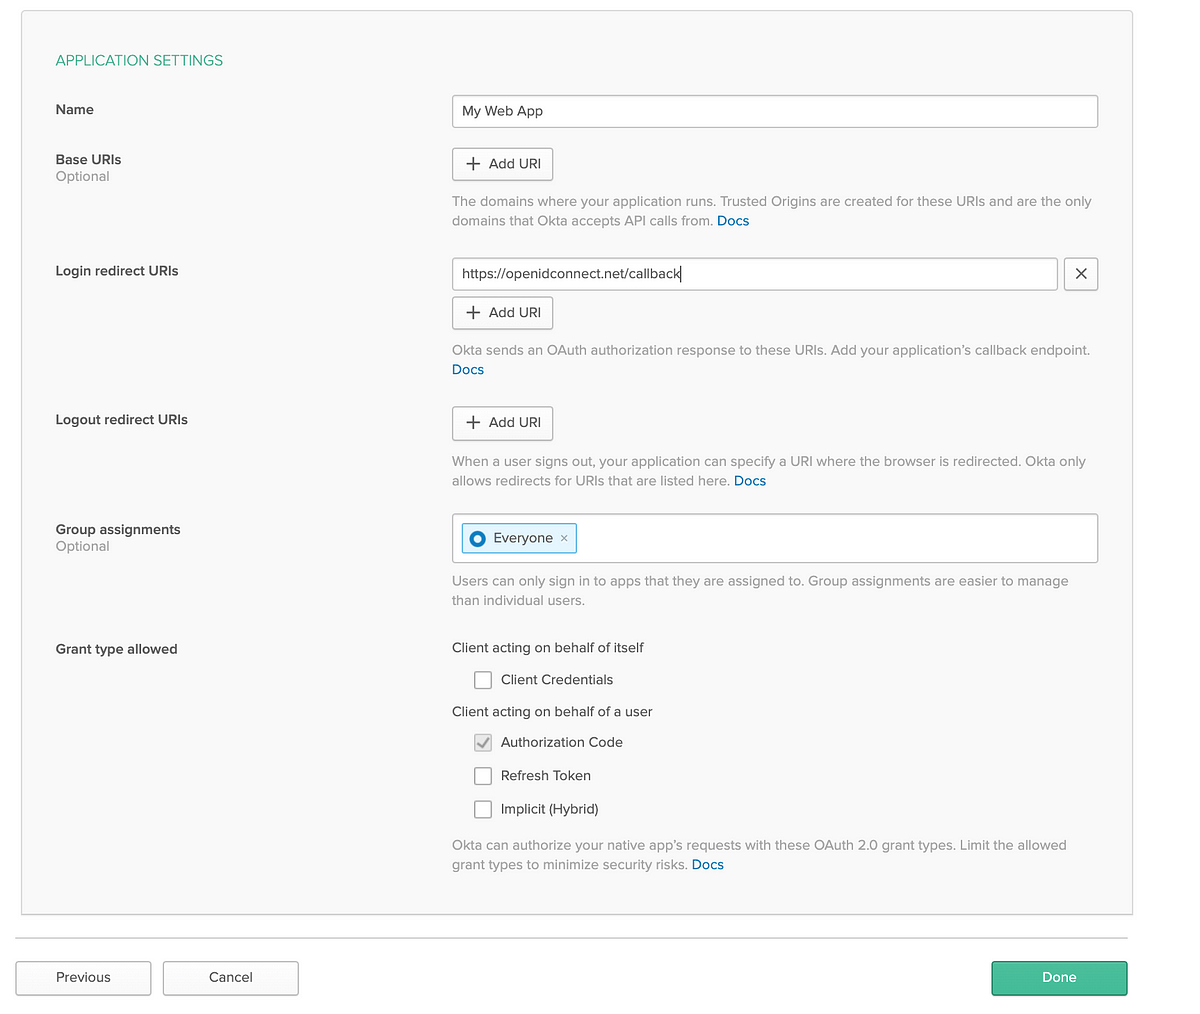
Next, the “Application Settings” section will show defaults for various fields.

NOTE: The “Login redirect URIs” field has to be set to https://openidconnect.net/callback for this demo to work.
-
Set a name for this Application.
-
Make sure that the “Authorization code” check box has been enabled.
-
Click “Done” to create the Application.
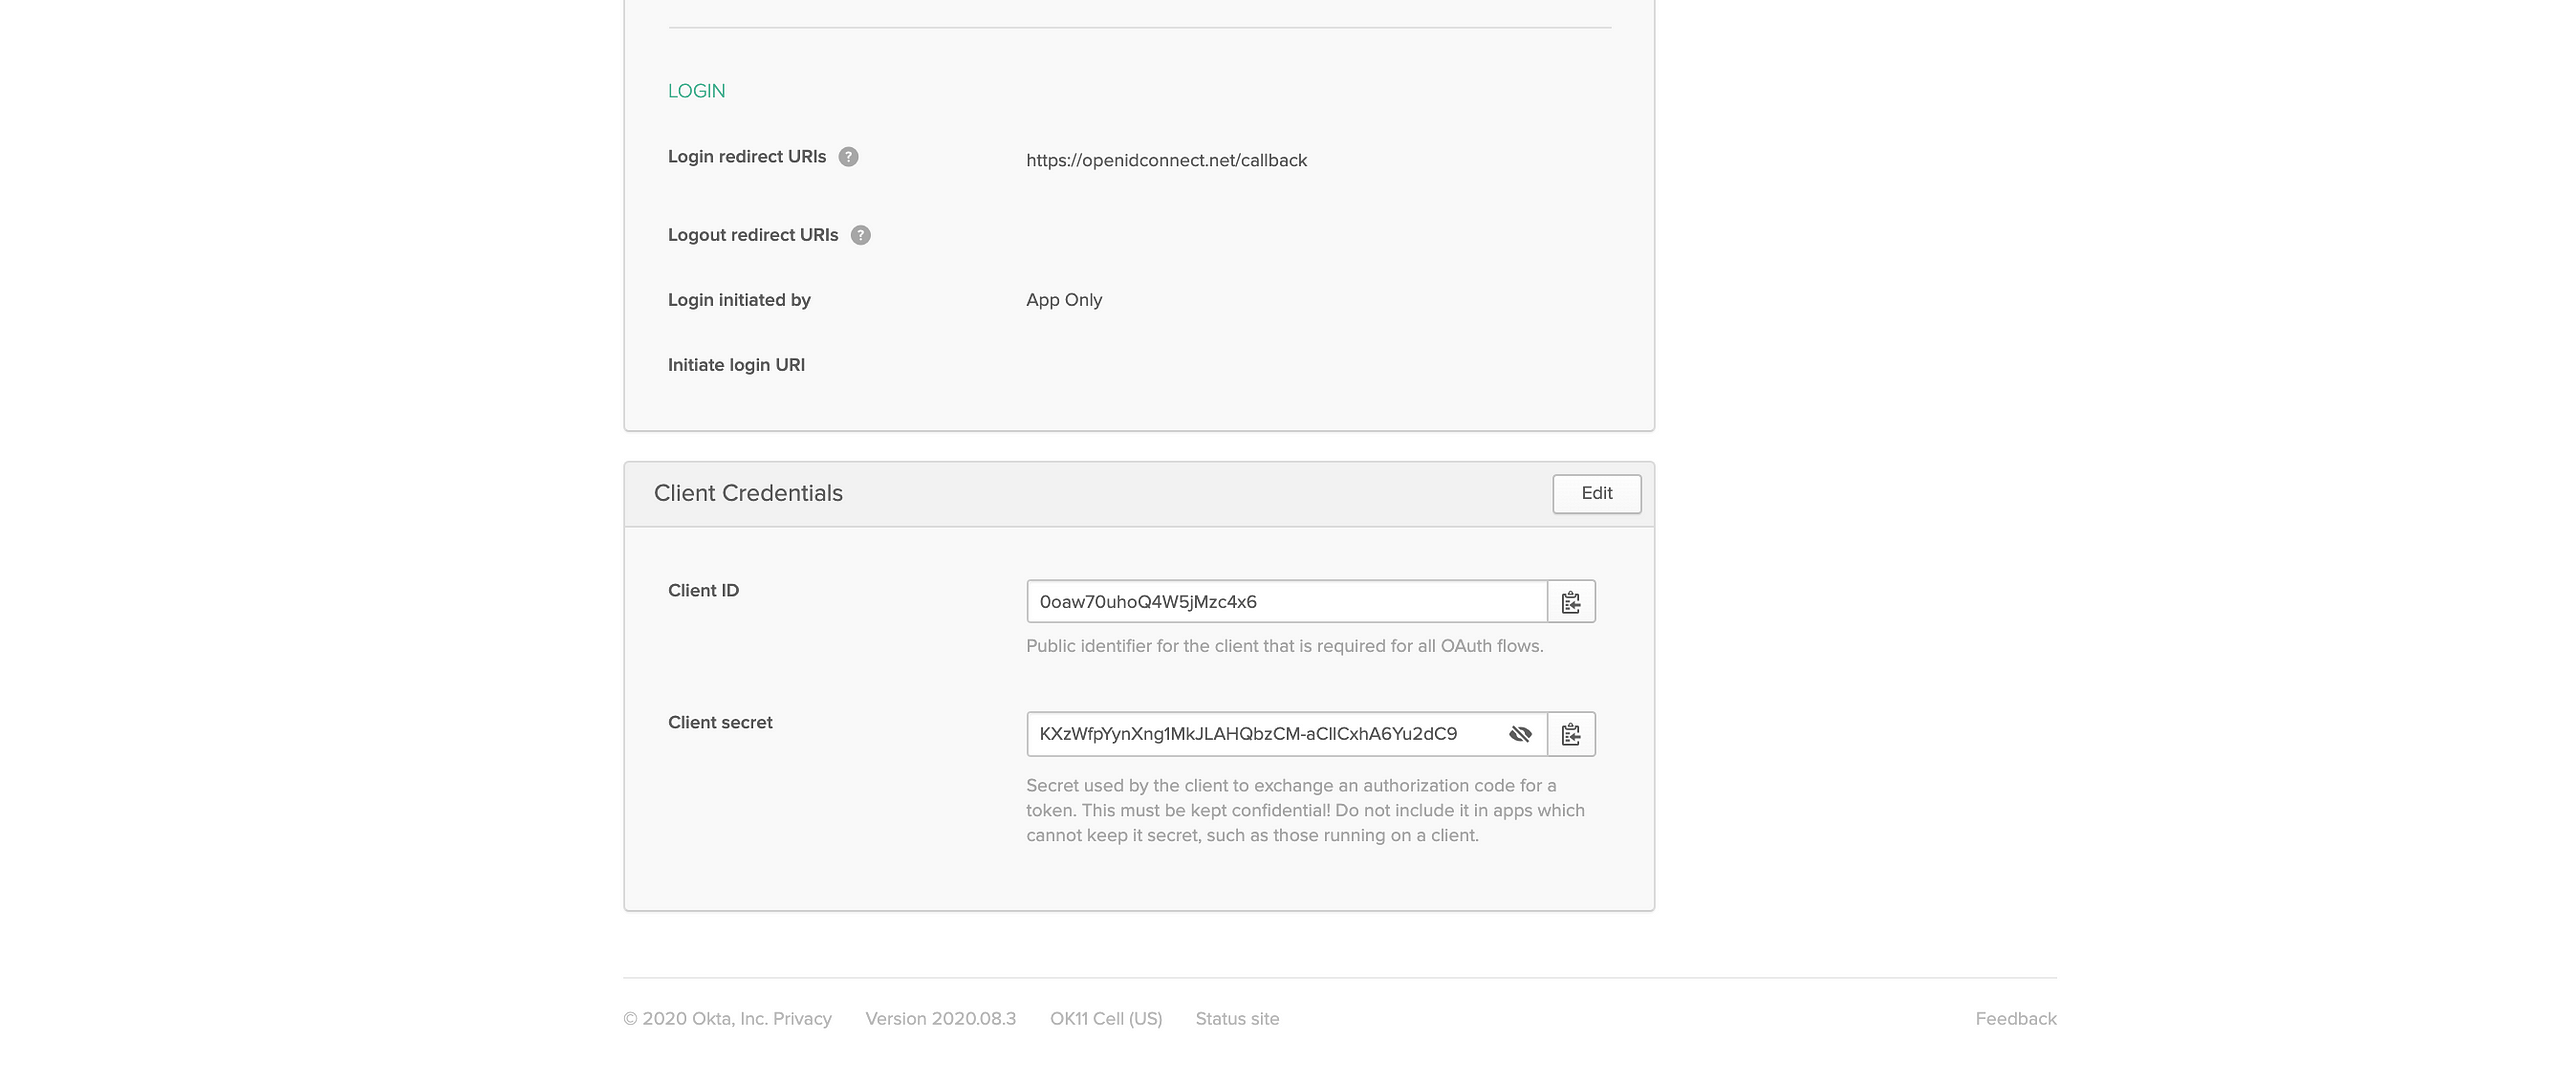
After clicking “Done”, you will see the screen below with the details of the App that was just created.

On scrolling down, a section titled “Client Credentials” will provide the “Client ID” and “Client secret” generated for this new Okta Application.
Make note of the “Client ID” and “Client secret”. We will be using that to setup the OpenID connect playground.
OpenID Connect Playground
After scrolling down, you will see a “Debugger” section. Click on the “Configuration” button on the right side.
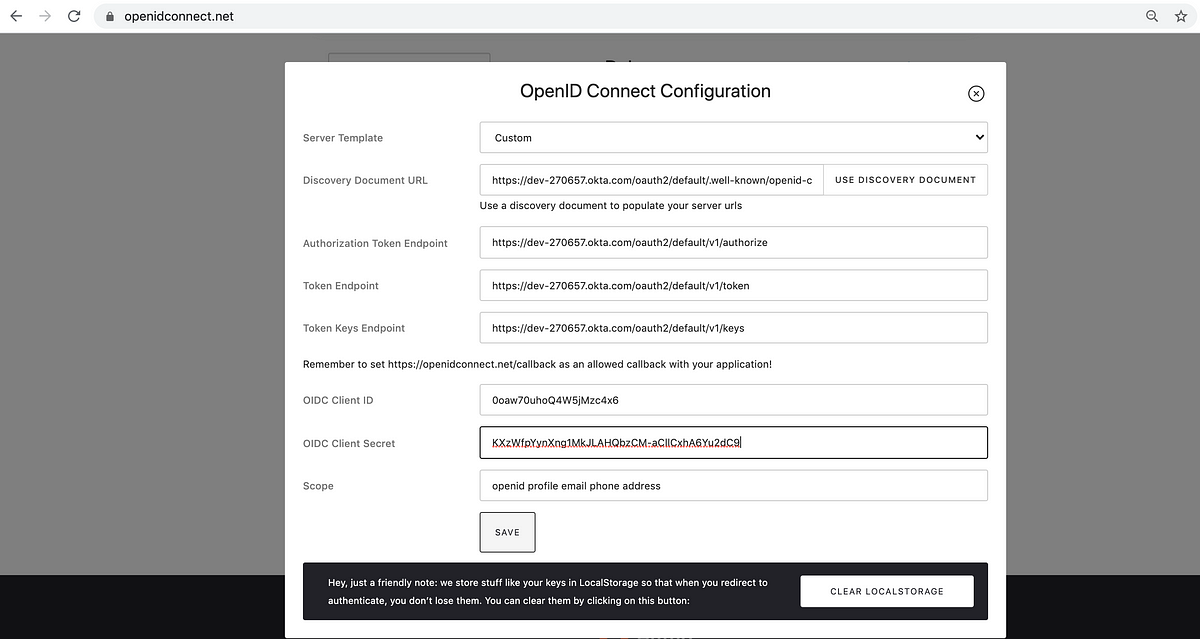
Configuration
-
Set Server Template as “Custom”.
-
Your Okta developer portal usually looks like a link like this https://dev-270657-admin.okta.com
-
Remove the “-admin” from the URL.
-
Append /.well-known/openid-configuration to https://dev-270657.okta.com
-
Paste https://dev-270657.okta.com/.well-known/openid-configuration to the “Discovery Document URL” field shown in the image below.
-
Click on “Use Discovery Document” . This will result in the other fields getting populated.
-
Copy and paste the Client ID and Client Secret for your Okta App in the “OIDC Client ID” and “OIDC Client Secret” fields and then click Save.
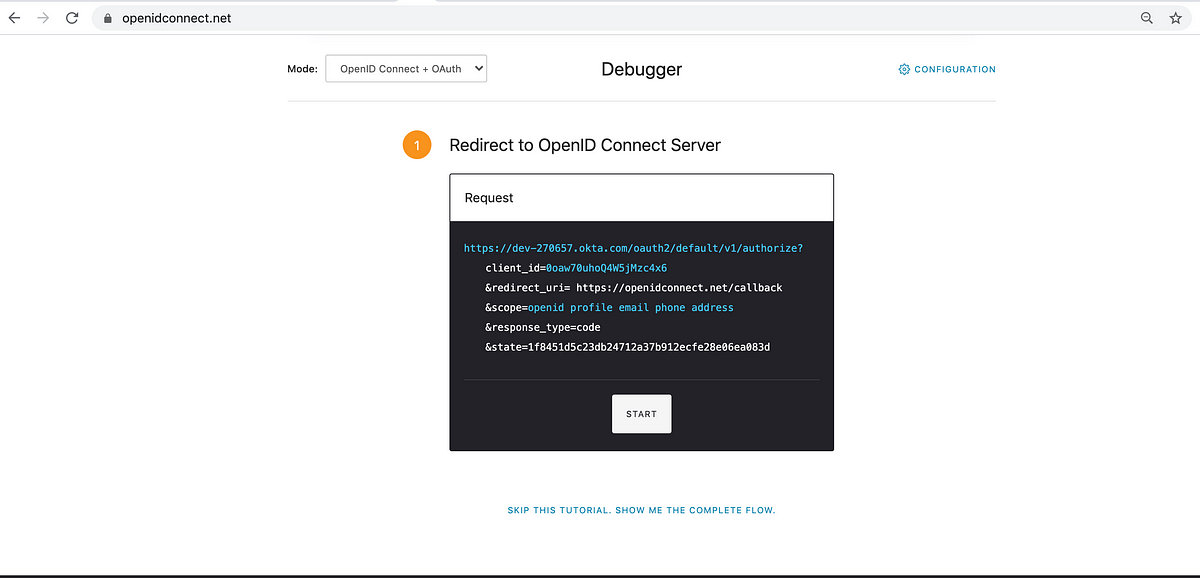
The OpenID connect playground then sets up a HTTP request with the fields necessary to start the Authorization code flow.
Notice the redirect_uri parameter is https://openidconnect.net/callback . This must match with the redirect URI configured in the OIDC provider account ( Okta in this post ) .
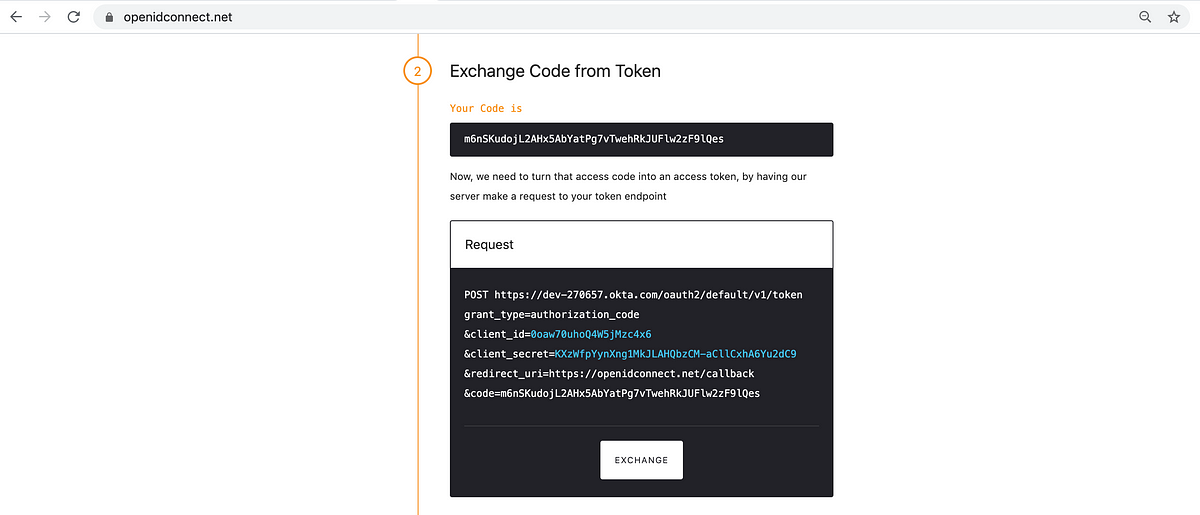
After clicking “Start”, the next screenshot shows that the OIDC provider responded with a temporary authorization code.
The playground has now setup another request that will use the temporary code to request for an access token .
The /token endpoint is used to request for an access token.
After clicking “Exchange”, the OIDC provider’s response shows the type of the token, the duration for which it is valid, an access_token, an id_token and the scopes that were requested.
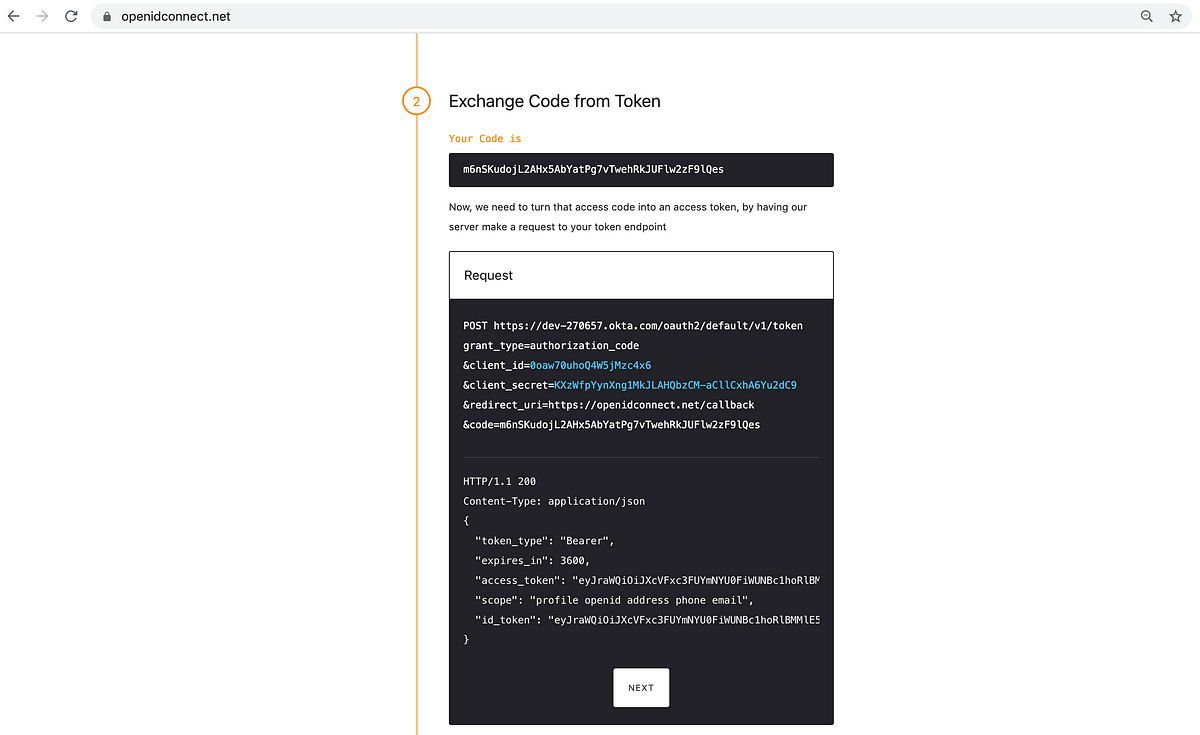
On clicking “Next”, the playground will provide the option of verifying the token with the OIDC provider.
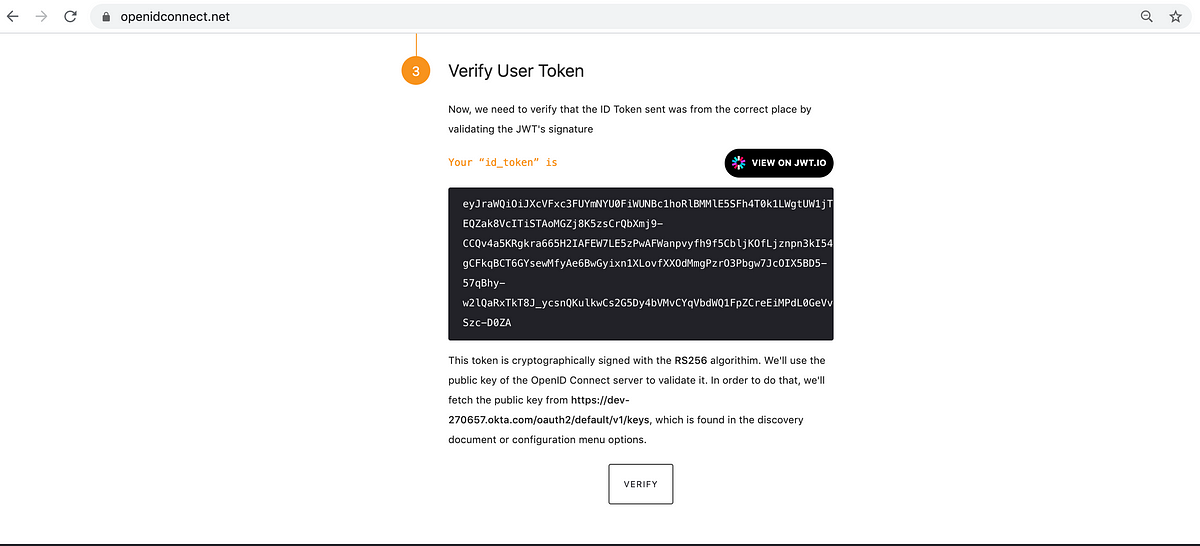
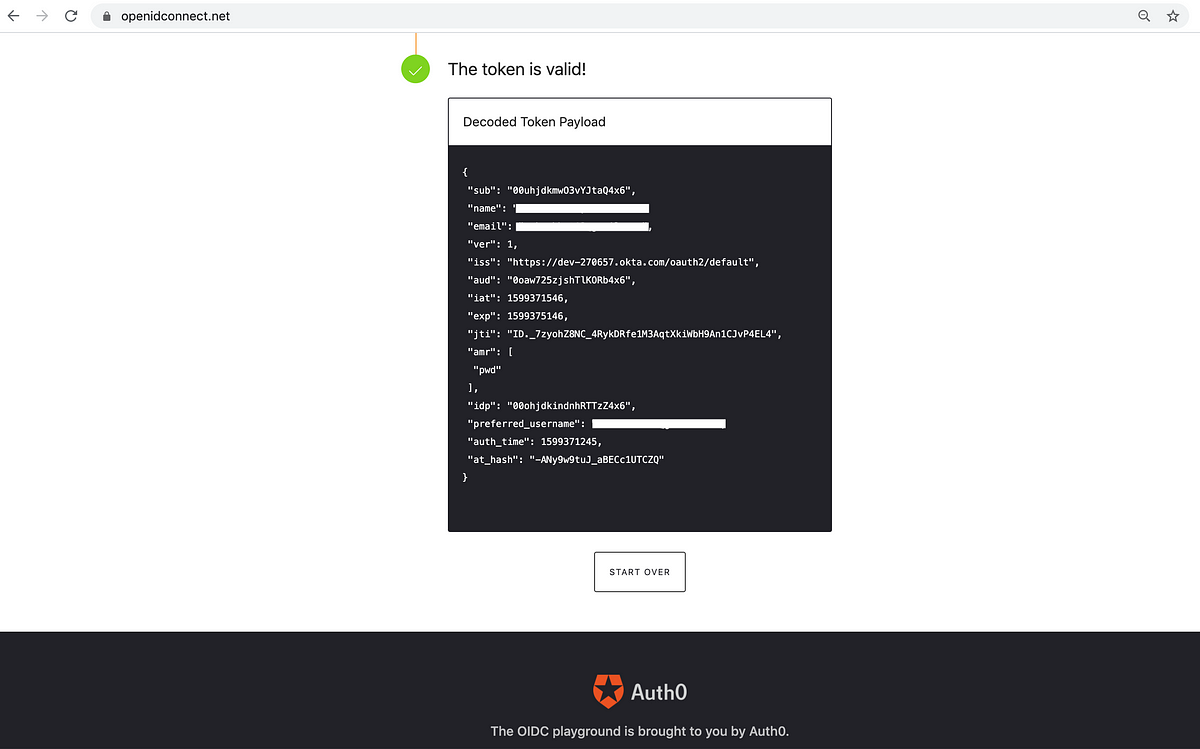
After clicking “Verify”, the playground will indicate if the token is valid or not.
The JWT(JSON Web Token) , i.e. the id_token, is parsed by the playground to display the fields of the token.
Conclusion
The OIDC playground serves as an independent tool to verify the fields in the ID token returned by the OIDC provider.
You can replace Okta with any other OIDC provider in the workflow described above.
Kudos to the Auth0 team for setting up the OpenID connect playground that can be used to test the Authorization code flow with any OIDC provider.
To setup K10 with OIDC follow these instructions